PicTextEdit Basic Tutorial: Manual Mode Image Modification Text Operation Demonstration
PicTextEdit's manual mode can handle text boxes containing multiple font colors and multiple font sizes. Manual mode requires some hands-on skills. If your image cannot be accurately restored using automatic mode, then you can try using manual mode.
Video Tutorial
Illustrated Tutorial
Ⅰ. Upload Image
- Open the PicTextEdit app.
- Prepare the screenshot you need to modify (it is recommended to use a high-resolution original image).
- When selecting images in the photo album, check the "Original Image" button.
- Note: Manual mode only works with images that have a solid-color background. If your image background is a gradient or a photograph taken with a camera, you may not get the desired results.
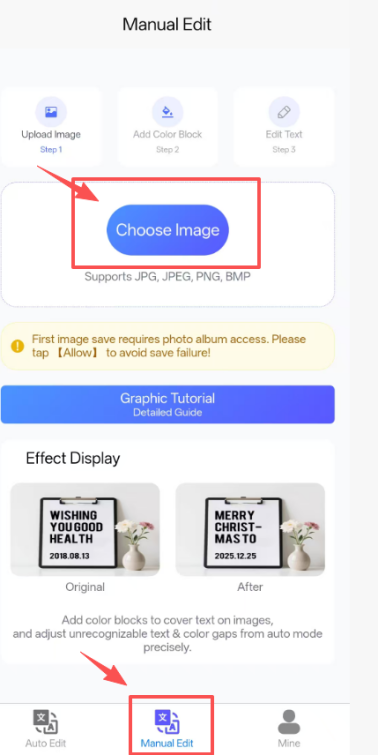
Upload Image Interface (Step 1: Choose Image / Step 2: Upload Image / Step 3: Edit Text)
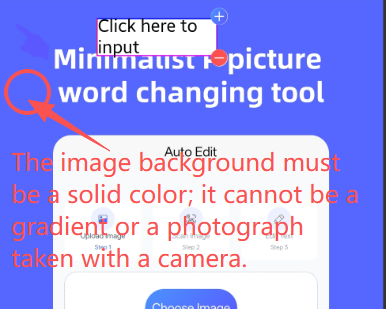
Notice: Image background must be solid color (not gradient or camera photograph)
Note: First image save requires photo album access. Please tap 【Allow】 to avoid save failure!
Ⅱ. Operating Techniques
- Enter the text you want to replace. Click the "+" or "-" buttons next to the text box to add or remove text boxes.
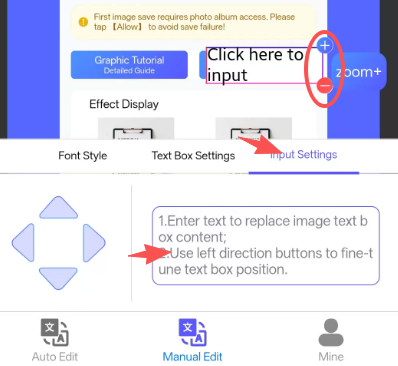
Enter Replacement Text & Text Box Settings
- The size of the text box can be adjusted using the "+" and "-" buttons for "Width" and "Height"; Adjust the text box size, then click the "Get BG Color" to restore the background color.
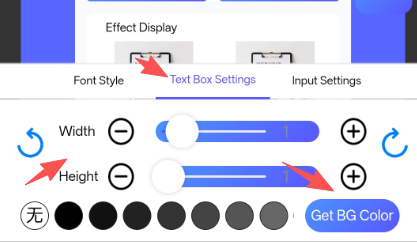
Adjust Text Box Size (Width/Height) & Get Background Color
- Drag the font list to match the font in the original image, click the "+" or "-" buttons next to "Size" to adjust the text size; then click "Font Color" or select from the font color list to restore the font color.
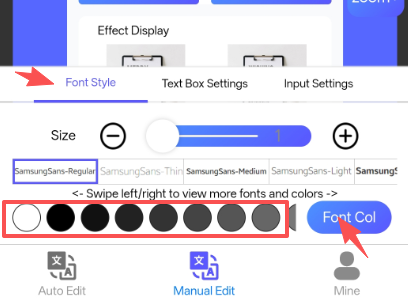
Font Selection & Text Size/Color Adjustment
- Press and hold the adjusted text box, drag it to the text area you want to replace, and then use the up, down, left, and right buttons to precisely cover the original text area;
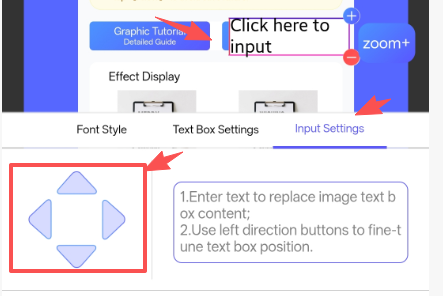
Drag & Precisely Position Text Box to Cover Original Text
Ⅲ. Saving and Verifying the Results
- Click the "Save" button in the upper right corner to save the image (you will need to allow the app to access your phone's photo gallery).
- After comparing the processed image with the original image, repeat the above processing techniques to optimize the image until it is very close to the original image.